
The Oster Convection Oven is a versatile kitchen appliance designed for efficient cooking. Its advanced convection technology ensures even heating and faster cooking times. With intuitive controls, it offers a user-friendly experience, making it an ideal choice for home cooks seeking precision and versatility in their culinary creations.
1.1 Overview of the Oster Convection Oven
The Oster Convection Oven is a high-performance countertop appliance designed to enhance your cooking experience. With its sleek stainless steel design and extra-large capacity, it offers versatile cooking options for various meal preparations. The oven features multiple cooking modes, including bake, broil, toast, and convection, allowing for precise control over your dishes. Its advanced convection technology ensures even heating and faster cooking times, making it ideal for roasting, baking, and toasting. The user-friendly interface and digital controls provide ease of operation, while the spacious interior accommodates large dishes. Perfect for home cooks and professionals alike, it combines efficiency, durability, and modern design to meet all your culinary needs.
1.2 Importance of Reading the Manual
Reading the Oster Convection Oven manual is essential for safe and effective operation. It provides detailed instructions for setting up, using, and maintaining the appliance. The manual outlines safety guidelines, such as avoiding overheating and proper cleaning procedures, to prevent accidents. Understanding the oven’s features, like convection mode and timer settings, ensures optimal performance. Additionally, the manual includes troubleshooting tips to resolve common issues, saving time and extending the appliance’s lifespan. Familiarizing yourself with the manual helps you maximize the oven’s capabilities while adhering to warranty conditions for coverage. It’s a crucial resource for both novice and experienced users.
Safety Precautions
Safety precautions are crucial when using the Oster Convection Oven. Always handle hot surfaces with care, use oven mitts, avoid overheating, and keep children away. Unplug before cleaning and never submerge in water to ensure safe operation and longevity.
2.1 General Safety Guidelines
Always handle the Oster Convection Oven with care to ensure safe operation. Avoid touching hot surfaces, and use oven mitts when handling trays or racks. Keep the oven out of reach of children and pets. Never leave the oven unattended while in use. Ensure the countertop is stable and heat-resistant. Avoid overheating the oven, as this can cause damage or fire hazards. Unplug the oven before cleaning and allow it to cool completely. Do not immerse the oven in water or expose it to excessive moisture. Regularly inspect the power cord and plug for damage. Follow all instructions in the user manual for proper usage and maintenance.
2.2 Electrical Safety Tips
To ensure electrical safety, always use the Oster Convection Oven with a properly grounded outlet. Avoid using damaged power cords or loose plugs, as this can cause electrical hazards. Never overload the outlet with multiple high-power appliances. Keep the oven away from water sources to prevent electrical shock. Unplug the oven when not in use or before cleaning. Avoid touching electrical components with wet hands. If the cord is damaged, contact Oster support for a replacement. Always follow the recommended voltage and power specifications provided in the user manual to maintain safe operation.
2.3 Child Safety Considerations
Ensure children are kept at a safe distance from the Oster Convection Oven while it is in operation. Teach them about the dangers of hot surfaces and electrical components. Never allow children to touch or play with the oven controls, as this can lead to accidental operation. Use the oven’s locking feature, if available, to prevent unauthorized use. Always supervise children in the kitchen and educate them about proper oven safety. Keep the oven out of reach of children to avoid burns or electrical accidents. Store cords securely to prevent tripping or accidental pulling of the appliance.
Product Features and Specifications
The Oster Convection Oven offers advanced features like convection technology, multiple cooking modes, and a spacious interior. It combines versatility with precision, making it ideal for home cooking.
3.1 Key Features of the Oster Convection Oven
The Oster Convection Oven is equipped with advanced features designed to enhance your cooking experience. It includes convection technology for faster and even heating, multiple cooking modes such as bake, broil, toast, and defrost, and a large capacity to accommodate various dish sizes. The oven features a digital control panel with intuitive controls, allowing for precise temperature and timer adjustments. Additional highlights include preset settings for common tasks, a stainless steel exterior for durability, and an easy-to-clean interior. These features make it a versatile and efficient addition to any kitchen, catering to both novice and experienced cooks alike.
3.2 Technical Specifications
The Oster Convection Oven models, such as TSSTTVF8GA-033 and TSSTTVXLDG-002, feature a 6-slice capacity and extra-large interiors for versatile cooking. With a power consumption of 1300-1500 watts, they offer precise temperature control between 150°F and 450°F. These ovens include digital controls with LED displays, adjustable timers up to 90 minutes, and convection fans for even heat distribution. Some models have interior lights for monitoring dishes and preset settings for common cooking tasks. Their compact designs and stainless steel exteriors ensure durability while fitting seamlessly into modern kitchens, making them ideal for home use.

Installation and Setup
Unbox and place the Oster Convection Oven on a stable, heat-resistant surface. Ensure proper ventilation and level the appliance for even heating. Plug in and follow calibration steps outlined in the manual for optimal performance.
4.1 Unpacking and Placement
Carefully unpack the Oster Convection Oven and inspect for damage. Place it on a heat-resistant, stable surface, ensuring it is level for even heating. Keep it away from flammable materials and ensure proper ventilation. Avoid placing it near water sources or in humid environments. Position the oven at least 4 inches away from any walls or adjacent surfaces for optimal airflow. Ensure the countertop is sturdy to support the oven’s weight. Proper placement is essential for safety and performance. Always follow the manual’s guidelines for installation location and setup.
4.2 Initial Setup and Calibration
Begin by plugging the Oster Convection Oven into a grounded electrical outlet. Ensure the oven is placed on a stable, heat-resistant surface. Before first use, preheat the oven to 350°F (175°C) for 30 minutes to eliminate any manufacturing residues. Calibration may be required to ensure accurate temperature control. Refer to the manual for specific calibration instructions, as this process varies by model. Once calibrated, set the clock and date using the control panel. Proper initial setup ensures optimal performance and safety. Always follow the manual’s guidelines for calibration to achieve precise temperature regulation and even cooking results.
Operating Instructions
Navigate the Oster Convection Oven’s intuitive control panel to select cooking modes, set timers, and adjust temperatures. Use convection for faster cooking, bake for even results, broil for browning, and toast for crispy textures. Ensure proper food placement on oven racks and refer to preset settings for optimal performance. Always preheat before cooking and monitor progress through the oven window for perfect results every time.
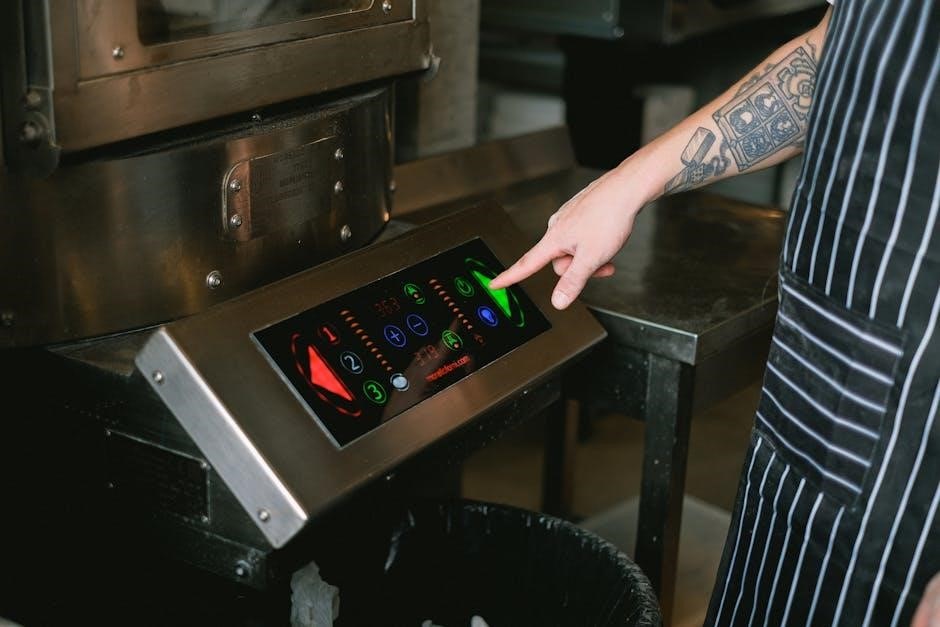
5.1 Control Panel Overview
The Oster Convection Oven features an intuitive control panel designed for easy navigation. The panel includes a digital LCD display for clear visibility of settings, function buttons for selecting cooking modes (Bake, Broil, Toast, Convection), and a temperature dial for precise adjustments. A start/stop button allows you to control cooking cycles, while a timer button helps set cooking durations. The panel also includes a preset button for quick access to commonly used settings. The layout is user-friendly, ensuring seamless operation for both novice and experienced users. The control panel is central to the oven’s functionality, enabling you to customize cooking parameters with ease and accuracy. Proper use ensures optimal results for various dishes. Always refer to the manual for detailed instructions on utilizing each feature effectively. This section provides a comprehensive guide to mastering the control panel, enhancing your overall cooking experience with the Oster Convection Oven. Regular updates and maintenance can further optimize its performance, making it a reliable addition to your kitchen. By familiarizing yourself with the control panel, you can unlock the full potential of your appliance, achieving professional-grade results in the comfort of your home. The Oster Convection Oven’s control panel is a testament to its innovative design, offering a perfect blend of functionality and simplicity. Explore its features to discover how it can elevate your culinary creations. With its advanced controls, this oven is designed to meet the demands of modern cooking while maintaining ease of use. The control panel’s responsiveness and clarity ensure that every adjustment is made with confidence, allowing you to focus on what truly matters—creating delicious meals for you and your loved ones. The Oster Convection Oven’s control panel is your gateway to a world of endless culinary possibilities, making it an indispensable tool in your kitchen. By understanding and utilizing its features, you can achieve consistent, high-quality results every time you cook. The control panel’s ergonomic design and intuitive interface make it accessible to all users, regardless of their skill level. This ensures that everyone can enjoy the benefits of convection cooking without complexity. The Oster Convection Oven’s control panel is a key element in its overall performance, providing the tools you need to cook with precision and creativity. With its robust features and user-centric design, the control panel is an essential component of your cooking experience. Always ensure to clean and maintain the control panel regularly to preserve its functionality and responsiveness. This will guarantee that your Oster Convection Oven continues to deliver exceptional results for years to come. The control panel’s durability and reliability are hallmarks of Oster’s commitment to quality, ensuring that your investment in this appliance is well-founded. By taking the time to learn and master the control panel, you can fully appreciate the versatility and power of the Oster Convection Oven. Whether you’re baking, broiling, toasting, or using convection, the control panel empowers you to achieve your culinary goals with ease and confidence. The Oster Convection Oven’s control panel is a brilliant example of how thoughtful design can enhance the cooking experience, making it an invaluable asset in any kitchen.
5.2 Setting the Timer
To set the timer on your Oster Convection Oven, locate the “Timer” button on the control panel. Press it to activate the timer function. Use the plus and minus buttons or the dial to adjust the time, displayed on the LCD screen. For example, press the plus button repeatedly until the display shows your desired time, such as 20 minutes. Once set, press the “Start” or “Enter” button to begin the countdown. The oven will start preheating or cooking once activated. Monitor the remaining time on the LCD display. When the timer reaches zero, the oven will beep, signaling completion. Open the oven door carefully to avoid burns. You can cancel or pause the timer using the “Cancel” button if needed. Always follow the manual’s instructions for accurate timing to ensure optimal cooking results.
5.3 Using Convection Mode
To use convection mode on your Oster Convection Oven, press the “Convection” button on the control panel. This activates the fan-assisted cooking feature, which circulates hot air for faster and more even cooking. Select the desired temperature using the arrow keys or dial. For best results, reduce the temperature by 25°F compared to traditional baking. Press “Start” to begin cooking. The fan will operate during this mode, ensuring crispy textures and uniform browning. Monitor cooking progress through the oven window, as convection cooking often completes faster. Refer to the manual for specific temperature and time recommendations for optimal outcomes.
5.4 Using Bake Mode
To use Bake Mode on your Oster Convection Oven, press the “Bake” button on the control panel. Set the desired temperature using the arrow keys or dial. Next, set the timer by pressing the timer button and adjusting the time. Press “Start” to begin baking. The oven will heat to the selected temperature and maintain it for consistent results. Monitor the cooking progress through the oven window. For optimal performance, ensure the oven tray is correctly positioned. Refer to the manual for specific temperature and time recommendations for various baked goods to achieve perfect results every time.
5.5 Using Broil Mode
To activate Broil Mode on your Oster Convection Oven, press the “Broil” button on the control panel. Use the arrow keys to select the desired temperature. Place food on the broiler tray, ensuring it is centered for even cooking. Position the rack on the middle or top rack position, depending on the food’s thickness. Set the timer using the timer button or dial. Press “Start” to begin broiling. The oven will use the top heating element to deliver high heat. Monitor the cooking process through the window, as broiling requires close attention to prevent overcooking. Use oven mitts when removing food to avoid burns.
5.6 Using Toast Mode
The Oster Convection Oven’s Toast Mode allows you to achieve perfectly toasted bread with ease. To use this feature, press the “Toast” button on the control panel. Use the arrow keys to select the desired level of browning (light to dark). Place your bread slices centrally on the oven rack, ensuring even exposure to heat. For optimal results, leave space between slices for air circulation. Set the timer if needed, though the oven will automatically shut off once toasting is complete. Press “Start” to begin. The oven will cycle heat to toast both sides evenly. Monitor the process through the window, and remove the toast using oven mitts to avoid burns.
5.7 Defrosting Function
The Oster Convection Oven’s defrosting function allows you to thaw frozen foods safely and evenly. To use this feature, press the “Defrost” button on the control panel. Use the arrow keys to set the desired defrosting time and temperature based on the type and weight of the food. Place the frozen item on the middle rack, ensuring proper air circulation. The oven will automatically adjust the temperature and fan speed to thaw the food without cooking it. Once the cycle is complete, remove the food and proceed with cooking if needed. Always refer to the manual for specific defrosting guidelines.
Cooking Guidelines
Adjust temperature and cooking times based on food type for optimal results. Use recommended settings for meats, vegetables, and baked goods. Ensure even cooking by placing food centrally on racks. Always preheat before cooking and refer to the manual for specific guidelines to achieve the best outcomes.
6.1 Temperature Settings for Different Foods
Proper temperature settings are crucial for achieving optimal cooking results; For meats like chicken or beef, set temperatures between 350°F to 425°F, depending on thickness and desired doneness. Fish typically requires lower temperatures, around 300°F to 375°F, to prevent overcooking. Vegetables cook best at 325°F to 400°F, ensuring crispiness without burning. Baked goods like cookies or cakes usually require temperatures between 300°F to 375°F. Always adjust settings based on food size and type, and refer to the manual for specific guidelines to ensure perfectly cooked dishes every time.
6.2 Recommended Cooking Times
Cooking times vary based on food type and personal preference. For frozen fries, 15-20 minutes in convection mode is ideal, while fresh fries may take 20-25 minutes. Chicken breasts typically require 15-25 minutes, depending on size, while fish fillets cook in 10-15 minutes. Vegetables like broccoli or cauliflower roast perfectly in 10-15 minutes, while root vegetables may need 20-30 minutes. Toasting slices of bread takes 2-4 minutes, and reheating leftovers generally requires 5-10 minutes. Always adjust times based on food thickness and desired crispiness, and consult the manual for specific guidelines to ensure optimal results.
6.3 Proper Use of Oven Trays
For optimal performance, place oven trays in the center of the rack, ensuring proper air circulation. Avoid overcrowding trays, as this can disrupt even cooking. Use the correct tray size for the food to prevent spills and ensure uniform heat distribution. Line trays with aluminum foil for easier cleanup, but avoid covering the entire tray to maintain airflow. Always preheat the oven before placing food on the trays. Never leave plastic wrap or non-oven-safe materials on trays during cooking. Follow the manual’s guidelines for tray placement and food arrangement to achieve the best results.
Maintenance and Cleaning
Regular maintenance ensures optimal performance. Clean the oven after each use with a damp cloth, avoiding abrasive cleaners. Check heating elements for food residue regularly.
7.1 Cleaning the Exterior and Interior
Regular cleaning is essential for maintaining your Oster Convection Oven’s performance and hygiene. Before cleaning, ensure the oven is unplugged and cool. For the exterior, use a soft, damp cloth to wipe away splatters and fingerprints. Avoid abrasive cleaners or scrubbers that may damage the finish. Inside, remove racks and trays and wash them with mild soap and warm water. Use a damp cloth to clean interior walls, focusing on food residue. Avoid immersing any electrical components in water. Dry all parts thoroughly before reuse to prevent rust or damage.
7.2 Replacing Heating Elements
Replacing heating elements in your Oster Convection Oven is essential for maintaining its performance. Start by unplugging the oven to ensure safety. Locate the heating elements, typically found at the top and bottom of the oven cavity. Remove any racks or trays for easy access. Use a screwdriver to remove screws or clips securing the elements. Carefully pull out the old elements and dispose of them properly. Install the new heating elements, ensuring they are compatible with your oven model as specified in the user manual. Reattach them using the screws or clips and reconnect any wiring according to the manual’s instructions. Once done, plug in the oven and test the heating function at a low temperature to confirm proper operation. Regularly checking and replacing heating elements can extend the oven’s lifespan and efficiency.
Troubleshooting Common Issues
Identify common issues such as uneven heating or the oven not turning on. Refer to the manual for solutions or contact Oster support for assistance.
8.1 Identifying and Resolving Common Problems
Common issues with the Oster Convection Oven include uneven heating or the oven not turning on. Check power connections and ensure the outlet is working. If the oven doesn’t heat, verify the temperature settings and function selection. For uneven cooking, ensure proper tray placement and airflow. Cleaning the oven regularly can prevent food residue buildup. Refer to the manual for troubleshooting guides or reset the oven by unplugging it for 30 seconds. If problems persist, contact Oster customer support for further assistance or repair services.

Warranty Information
Oster offers a limited warranty covering defects in materials and workmanship for one year from purchase. Warranty excludes misuse or normal wear and tear. Register your product at www.oster.com to validate coverage.
9.1 Understanding Your Warranty Coverage
Oster provides a one-year limited warranty for its convection ovens, covering defects in materials and workmanship. This warranty ensures repairs or replacements for faulty parts during the coverage period. To validate your warranty, register your product on the Oster website within 30 days of purchase. Keep your purchase receipt as proof of ownership. The warranty excludes damage caused by misuse, neglect, or normal wear and tear. For claims, contact Oster customer support with your product details. Understanding your warranty ensures protection and support for your appliance, providing peace of mind for your investment.
Customer Support
Oster provides dedicated customer support to address your queries and concerns. Contact their team via phone, email, or visit their official website for assistance and resources.
10.1 Contacting Oster Support
For assistance with your Oster Convection Oven, contact Oster Support through their official website or customer service hotline. Visit www.oster.com to access the support section, where you can find contact forms, FAQs, and troubleshooting guides. You can also reach their team via phone or email for direct inquiries. Ensure you have your product model number and a detailed description of your issue ready for faster assistance. Oster’s support team is available to help with product-related questions, warranty claims, and technical issues, ensuring a smooth and satisfying user experience.
10.2 Online Resources and FAQs
Oster provides extensive online resources to support your convection oven experience. Visit their official website at www.oster.com to explore FAQs, troubleshooting guides, and downloadable manuals. Additionally, platforms like ManualsLib and Manua.ls offer easy access to PDF versions of user manuals for various Oster models. These resources cover topics such as maintenance, cooking tips, and technical specifications. For common queries, FAQs address issues like error codes, cooking times, and warranty details. Online forums and community discussions also offer insights and solutions from experienced users. Utilize these resources to maximize your oven’s performance and resolve any concerns efficiently.
Accessories
The Oster Convection Oven supports various accessories to enhance functionality. These include baking trays, oven racks, and heat-resistant mitts, designed to optimize cooking performance and ensure safety.
11.1 Recommended Accessories
The Oster Convection Oven is compatible with a variety of accessories designed to enhance your cooking experience. These include durable baking trays, adjustable oven racks, and heat-resistant oven mitts for safe handling. Additionally, non-stick pans and silicone mats are recommended for easy food release and cleanup. A recipe book tailored for convection cooking is also available, offering creative ideas to maximize the oven’s capabilities. These accessories can be purchased directly from Oster’s official website or authorized retailers, ensuring compatibility and quality. They are designed to optimize performance and versatility, making your cooking process more efficient and enjoyable.
Energy Efficiency
The Oster Convection Oven features energy-saving technology, ensuring efficient heating and reduced power consumption. Its eco-friendly design promotes lower energy bills while maintaining superior cooking performance and consistency.
12.1 Eco-Friendly Cooking Tips
To maximize energy efficiency, use the convection mode for faster cooking times and lower temperatures. Preheat only when necessary and defrost foods before cooking to reduce energy consumption. Utilize the oven’s interior space efficiently by batch cooking to minimize repeated heating. Regularly clean the oven to maintain optimal performance and avoid overheating. Always unplug the oven when not in use to prevent standby power consumption. By following these eco-friendly tips, you can reduce your environmental impact while enjoying delicious, evenly cooked meals with your Oster Convection Oven.
Recipes and Cooking Tips
Explore delicious recipes and tips for your Oster Convection Oven. From crispy roasted vegetables to perfectly baked cakes, enhance your cooking with precise temperature control and even heating.
13.1 Delicious Recipes for Your Oster Oven
Your Oster Convection Oven opens the door to endless culinary possibilities. Try roasted vegetables with a crispy texture, perfectly baked fish, or hearty casseroles. For dessert, whip up gooey cookies or a golden-brown pizza; The convection mode ensures even browning and faster cooking, making every dish a success. Experiment with specific temperature settings for meats, vegetables, and baked goods to achieve flawless results. With its spacious interior, you can cook multiple dishes at once, perfect for family meals or entertaining guests. Let your creativity shine and enjoy restaurant-quality meals right at home!
13.2 Enhancing Cooking with Convection
Convection cooking in your Oster Oven elevates your culinary skills by circulating hot air evenly, ensuring crispy textures and caramelized flavors. This mode reduces cooking time by up to 30% compared to traditional methods. Ideal for roasting meats, baking bread, and cooking vegetables, it enhances browning and locks in moisture. For optimal results, lower temperatures by 25°F and shorten cooking times. The convection feature also allows for healthier frying without extra oil, making it perfect for snacks like crispy fries or chicken wings. Experiment with convection to achieve professional-level dishes effortlessly at home.

Technical Specifications
The Oster Convection Oven features 1300 watts of power, a 6-slice capacity, and dimensions of 19.72 x 15.75 x 10.79 inches, weighing 20.3 pounds, operating at 120V.
14.1 Detailed Product Specifications
The Oster Convection Oven (model TSSTTVF815) operates at 1300 watts, offering a 6-slice capacity and dimensions of 19.72 x 15.75 x 10.79 inches, weighing 20.3 pounds. It features a stainless steel exterior with a digital control panel, including a backlit LCD display. The oven supports temperatures from 150°F to 450°F, with preset settings for baking, broiling, toasting, and convection cooking. It includes a 12-inch pizza pan, wire rack, and baking pan, with a 2-hour timer and automatic shut-off. The interior light allows monitoring of food without opening the door, ensuring even cooking and user convenience.