Brother 1034D Manual: A Comprehensive Guide
This guide delves into the Brother 1034D serger, offering insights into its features, troubleshooting, and accessing essential manuals for optimal performance․
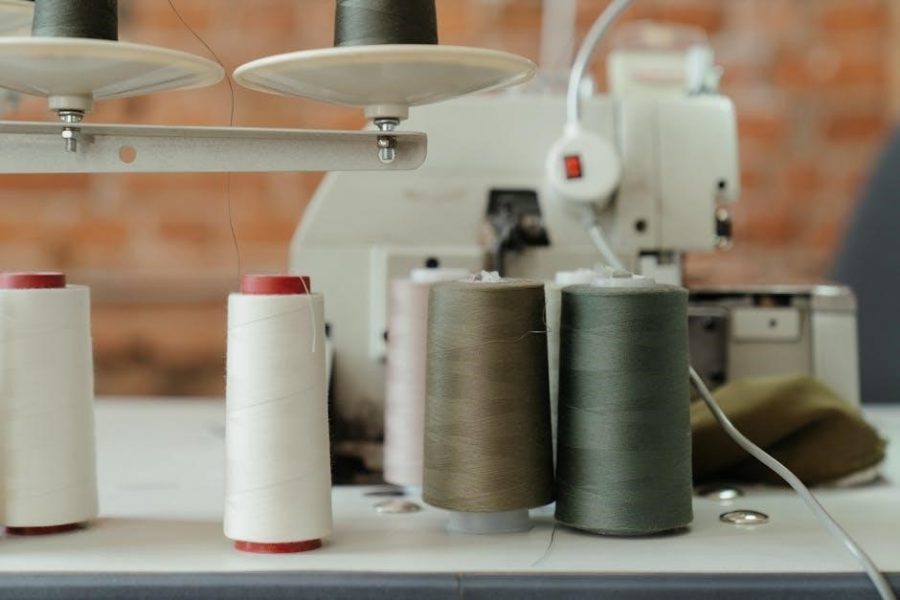
The Brother 1034D is a popular and reliable 4-thread serger, favored by both beginners and experienced sewists․ It’s known for its ability to create professional-looking seams on a variety of fabrics․ This serger excels at overlocking, creating a clean edge to prevent fraying, and is a versatile tool for garment construction and crafting․
Understanding your machine through its manual is crucial․ Available resources, including digital downloads from sites like Etsy and Pocono Sew-Vac, provide detailed instructions․ These manuals unlock the full potential of the 1034D, guiding users through setup, threading, and maintenance․ Proper use ensures longevity and optimal stitching quality․
Understanding the 1034D Model Variations (1034DX, 2104D, 2104DV, 2504D)
While sharing a core functionality, the Brother 1034D serger family includes variations like the 1034DX, 2104D, 2104DV, and 2504D․ These models often differ in included accessories, automatic features, or slight design modifications․ However, the fundamental threading and operational principles remain largely consistent across the range․
Crucially, service manuals and parts diagrams available on platforms like Etsy often cover multiple variations․ When sourcing a manual, confirm compatibility with your specific model number․ Though adjustments may be similar, referencing the correct documentation ensures accurate timing and maintenance procedures․ Understanding these nuances maximizes your serger’s performance․
Key Features and Applications
The 1034D excels at overlock, rolled hem, and flatlock stitches, making it versatile for garment construction and decorative sewing projects․
Basic Serger Functions: Overlock, Rolled Hem, Flatlock
The Brother 1034D masterfully performs three core serger functions․ Overlock creates a professional finish, encasing raw edges to prevent fraying – ideal for garments․ Rolled hem produces a delicate, narrow hem perfect for lightweight fabrics like scarves or napkins, adding a refined touch․
Flatlock, a more specialized technique, joins fabrics with a flat seam, often used in sportswear or decorative applications․ Understanding these functions unlocks the 1034D’s potential․ Adjustments to stitch length and width, alongside differential feed, are key to achieving desired results with each technique․ Experimentation is encouraged to fully grasp the capabilities of this versatile machine․
Fabric Types Suitable for the 1034D
The Brother 1034D excels with a wide range of fabrics, from lightweight knits to medium-weight woven materials․ It handles delicate fabrics like chiffon and voile beautifully, creating professional rolled hems․ Stable knits, such as interlock and double knit, serge cleanly and efficiently․
Denim and canvas, while manageable, require careful needle and thread selection․ Avoid extremely thick or bulky fabrics, as they may strain the machine․ Adjusting the differential feed is crucial for preventing puckering or stretching, especially with knit fabrics․ Always test on a scrap piece before serging your final project to ensure optimal stitch quality and prevent damage․
Common Sewing Projects with the 1034D
The Brother 1034D is incredibly versatile, making it ideal for numerous sewing projects․ It’s perfect for finishing garment seams quickly and professionally, creating a durable and clean edge․ Knit clothing, like t-shirts and leggings, benefit greatly from its stretch-compatible serging․
Beyond garments, the 1034D excels at creating rolled hems on scarves, napkins, and lightweight dresses․ It’s also fantastic for constructing baby clothes, lingerie, and home décor items like pillowcases and curtains․ With practice, you can even tackle more complex projects like quilts and bags, utilizing its flatlock stitch for decorative effects․
Manual Access and Resources
Locate official Brother 1034D instruction and service manuals digitally via Etsy, Pocono Sew-Vac, or direct download links for immediate access․
Locating the Official Brother 1034D Instruction Manual
Finding the official Brother 1034D instruction manual is crucial for understanding your serger’s capabilities․ While a physical copy may have been included with your purchase, digital versions are readily available online․ Pocono Sew-Vac offers free digital manuals for download, providing a convenient resource for users․
Alternatively, platforms like Etsy host downloadable versions, including comprehensive service manuals and parts diagrams – though these are often available for purchase․ Remember to verify the source’s reliability before downloading any files․ These manuals detail everything from basic operation to advanced techniques, ensuring you can maximize your Brother 1034D’s potential and maintain its performance effectively․
Digital Manual Availability and Download Options (Etsy, Pocono Sew-Vac)
Fortunately, accessing digital versions of the Brother 1034D manual is straightforward․ Pocono Sew-Vac provides free digital manuals directly on their website, offering a convenient and cost-effective solution․ Etsy emerges as a prominent marketplace for downloadable service manuals and detailed parts diagrams, though these typically require a purchase․
Etsy listings often feature instant download links, allowing immediate access to PDF files compatible with various devices․ These PDFs can be viewed on computers, tablets, and smartphones․ Remember that service manuals, available on Etsy, offer in-depth repair information and timing adjustment guides, going beyond the scope of the standard instruction manual․
Service Manuals: When and Why You Need One
While the standard Brother 1034D instruction manual covers basic operation, a service manual becomes invaluable for more complex issues․ You’ll need one when tackling internal repairs, timing adjustments, or diagnosing intricate stitching problems․ These manuals, often found on platforms like Etsy, provide detailed schematics and repair information specifically for electronics experts or confident DIYers․
A service manual guides you through procedures like adjusting the serger’s timing, which is crucial for consistent stitch formation․ It’s not a beginner’s resource; it assumes a level of technical understanding․ If you’re uncomfortable with detailed mechanical work, consulting a qualified technician is always recommended;

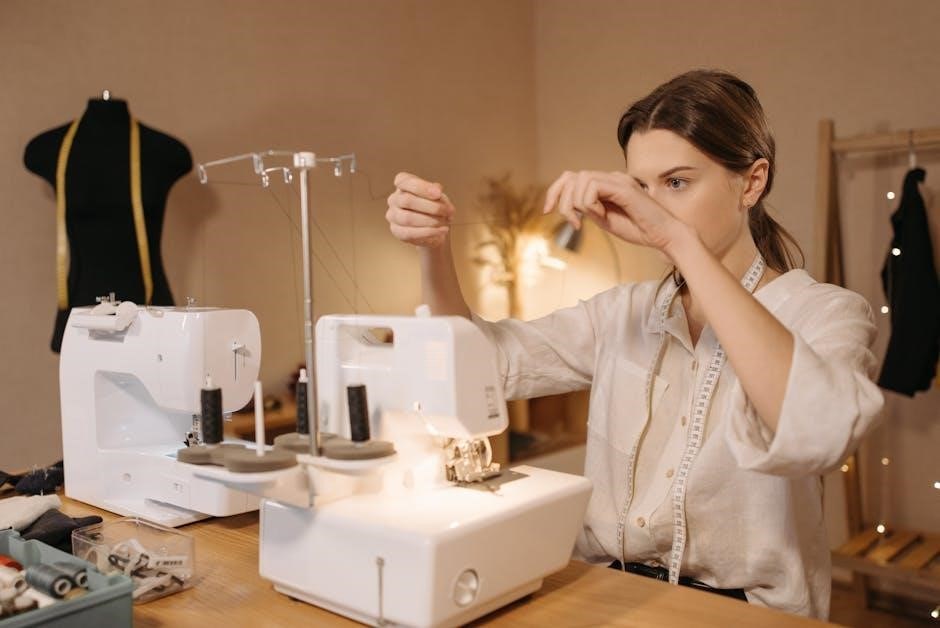
Threading and Initial Setup
Proper threading of the upper and lower loopers, along with the needles, is fundamental for successful serging with your Brother 1034D machine․
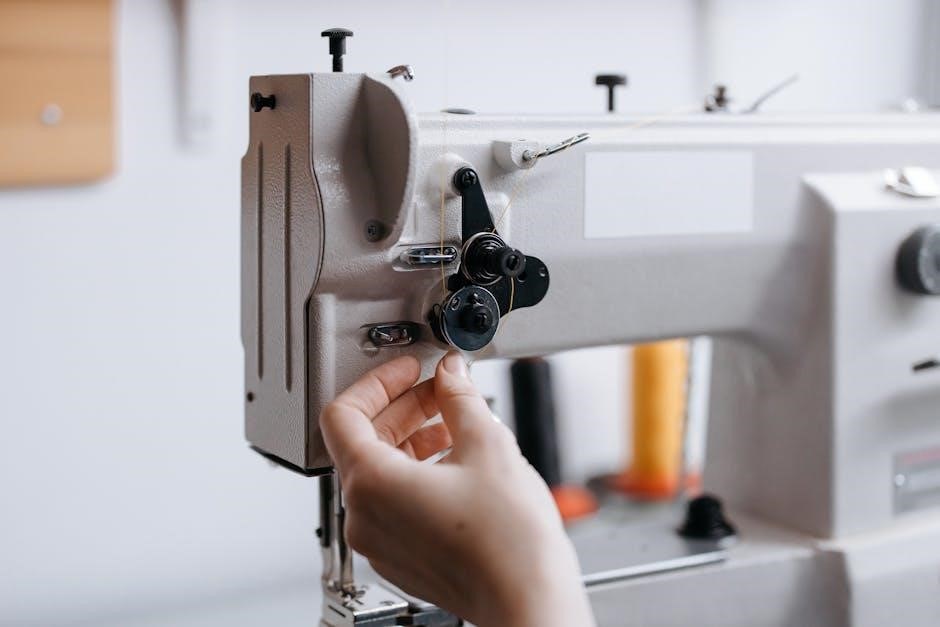
Threading the Upper Looper
Successfully threading the upper looper on your Brother 1034D is crucial for forming a balanced and professional-looking stitch․ Begin by raising the upper looper lever to its highest position․ Next, secure the thread spool on the spool pin and guide it through the thread guides, ensuring it follows the designated path indicated in your manual․
Carefully insert the thread through the tension disc and then down through the upper looper shaft․ Finally, draw the thread through the eye of the upper looper․ A gentle tug confirms correct threading․ Incorrect threading will lead to skipped stitches or uneven seams, so double-check against the diagram in the official manual for accuracy․
Threading the Lower Looper
Threading the lower looper on the Brother 1034D requires precision․ First, ensure the presser foot is raised․ Locate the lower looper threading path, typically involving several guides and a tension assembly․ Secure the thread spool and follow the manual’s diagram meticulously, guiding the thread through each component․
Pay close attention to the metal plate and ensure the thread is correctly positioned beneath it before entering the looper eye․ Draw the thread through the eye of the lower looper and gently pull to confirm it’s properly seated․ Incorrect lower looper threading often results in looping or tangled stitches, necessitating re-threading;
Threading the Needles
Threading the needles on the Brother 1034D is a crucial step for proper stitch formation․ Begin by raising the needles to their highest position using the handwheel․ Locate the needle threading path, which usually involves threading through guides and a small hole near the needle eye․ Utilize a needle threader if needed, especially with finer threads․
Ensure the thread is securely inserted through the needle eye from front to back․ Repeat this process for both needles, maintaining consistent thread tension․ Incorrect needle threading can lead to skipped stitches or thread breakage, so double-check your work against the manual’s illustrations․
Adjusting Thread Tension
Proper thread tension is vital for achieving balanced and professional-looking serged seams on the Brother 1034D․ Begin with the default tension settings recommended in the manual․ Test sew on a scrap fabric, observing the stitch formation․ If the seam puckers, loosen the upper looper tension․ Conversely, if the seam loops, tighten it․
Adjust the needle tensions similarly, making small incremental changes․ A balanced stitch will lie flat with no loose threads or puckering․ Remember to re-test after each adjustment․ Consistent tension ensures durability and prevents thread breakage, contributing to high-quality sewing results․
Maintenance and Troubleshooting
Regular cleaning, needle replacements, and addressing common stitching issues are crucial for maintaining your Brother 1034D’s performance and longevity․
Regular Cleaning Procedures
Maintaining a clean Brother 1034D serger is paramount for smooth operation and preventing issues․ Power down and unplug the machine before any cleaning․ Use a soft brush to remove lint and debris from all areas, including the loopers, needles, and feed dogs․ Compressed air can effectively dislodge stubborn lint․
Pay close attention to the tension discs, ensuring they are free from fiber buildup․ A small amount of sewing machine oil applied to these areas (and the loopers) can keep things running smoothly – use sparingly! Regularly clean the lower looper area, as lint accumulates quickly there․ Consistent cleaning, even after each use, will significantly extend the life of your serger and maintain stitch quality․
Needle Replacement Guide
Replacing needles on your Brother 1034D is a straightforward process, crucial for optimal stitch formation․ Always power off and unplug the machine first․ Loosen the needle clamp screw, then gently remove the old needle․ Ensure you’re using the correct needle type (typically HAx1SP) and size for your fabric․
Insert the new needle, with the flat side facing the back of the machine․ Tighten the needle clamp screw securely, but avoid over-tightening․ Repeat for all needles․ Regularly replacing dull or damaged needles prevents fabric damage and ensures consistent stitch quality․ A service manual can provide detailed diagrams for needle placement if needed․
Troubleshooting Common Stitching Problems
Encountering stitching issues with your Brother 1034D? Uneven stitches often indicate incorrect threading or tension․ Re-thread the machine carefully, consulting the manual’s diagrams․ Skipped stitches can result from a bent or dull needle – replace it immediately․
If fabric puckers, adjust the differential feed․ Broken threads frequently stem from improper tension or incorrect needle threading․ A service manual offers advanced timing adjustment guidance․ Always test adjustments on scrap fabric before starting your project․ Consistent maintenance, as outlined in the manual, prevents many common problems․
Timing Adjustments (Using a Service Manual)
Precise timing is crucial for optimal Brother 1034D performance, but adjustments should only be attempted with a dedicated service manual․ Incorrect timing leads to skipped stitches, poor loop formation, and overall unsatisfactory results․ The service manual provides detailed diagrams and step-by-step instructions for locating and adjusting timing components․
This process involves loosening specific screws and carefully rotating the upper and lower looper shafts to achieve proper synchronization․ It’s a delicate procedure requiring patience and precision․ Improper adjustments can cause further damage; therefore, a service manual is essential for electronics experts․
Advanced Techniques
Mastering differential feed, stitch length/width, and rolled hem settings unlocks the full potential of your Brother 1034D serger for diverse projects․
Differential Feed Adjustment
The differential feed is a crucial feature on the Brother 1034D, controlling fabric movement during serging․ Adjusting this setting prevents stretching or puckering, especially with knit or delicate fabrics․ A higher differential feed (above 1․0) gathers fabric, ideal for creating ruffles or decorative effects․ Conversely, a lower setting (below 1․0) reduces fabric feed, preventing stretching on loosely woven materials․
Experimentation is key! Start with the default setting of 1․0 and incrementally adjust based on your fabric and desired outcome․ Observe the stitch formation closely; if the fabric is wavy, decrease the feed․ If it’s stretching, increase it․ Proper differential feed adjustment ensures professional-looking serged edges and consistent stitch quality across various materials․
Adjusting Stitch Length and Width
Controlling stitch length and width on the Brother 1034D allows for versatile serging capabilities․ Stitch length is adjusted via a dial, influencing the density and strength of the seam․ Shorter stitches are ideal for lightweight fabrics and delicate finishes, while longer stitches suit heavier materials and provide greater stretch․
Stitch width, though less frequently adjusted, impacts the seam allowance and overall appearance․ Wider stitches create a broader, more substantial seam․ Refer to your manual for specific markings and recommended settings for different fabric types and desired effects․ Practice on scrap fabric to achieve the perfect stitch configuration for each project․
Rolled Hem Settings and Techniques
Achieving a beautiful rolled hem on the Brother 1034D requires specific settings and a bit of practice․ Begin by disengaging the knife and converting to rolled hem mode, typically involving adjustments to the looper settings․ The manual provides detailed diagrams illustrating this conversion process․
Experiment with the differential feed and stitch length dials to fine-tune the hem’s tightness and appearance․ Lightweight fabrics generally require lower differential feed settings․ Consistent tension is crucial; test on scrap fabric before serging your project; A properly executed rolled hem creates a delicate, professional finish on scarves, napkins, and lightweight garments․

Parts and Accessories
Explore compatible accessories and replacement parts, including feet and needles, essential for maintaining and enhancing your Brother 1034D serger’s functionality․
Identifying Key Parts (Diagrams)
Understanding the anatomy of your Brother 1034D is crucial for maintenance and repair․ Key components include the upper and lower loopers, needles, presser feet, tension discs, and differential feed mechanism․ Service manuals, readily available as instant downloads from platforms like Etsy, provide detailed exploded view diagrams․
These diagrams visually break down the serger, labeling each part with its corresponding number․ This allows for accurate identification when ordering replacements or performing adjustments; Familiarizing yourself with these parts, alongside the service manual’s schematics, empowers you to confidently tackle repairs and ensure your machine operates smoothly․ Proper part identification prevents incorrect installations and potential damage․
Compatible Accessories and Feet
Expanding the versatility of your Brother 1034D is easily achieved with compatible accessories and presser feet․ Pocono Sew-Vac and other retailers offer a range of options, including specialized feet for rolled hems, gathering, blind hems, and decorative stitching․ Genuine Brother parts ensure optimal performance and prevent damage to your machine․
Beyond standard feet, consider spool pins, caps, and stands for efficient thread management․ Utilizing the correct accessories unlocks advanced techniques and broadens project possibilities․ Refer to your instruction manual or online resources to confirm compatibility before purchasing․ Investing in quality accessories enhances your serging experience and allows for greater creative control․
Sourcing Replacement Parts
Maintaining your Brother 1034D often requires replacing worn or damaged parts․ Etsy is a valuable resource, offering both original Brother parts and compatible alternatives, including service manuals with detailed parts diagrams․ Pocono Sew-Vac also provides genuine Brother replacement components, ensuring quality and fit․
When ordering, carefully identify the specific part needed using your machine’s model number (1034D, 1034DX, etc․)․ Service manuals are crucial for identifying parts and understanding assembly․ Always prioritize genuine Brother parts when possible, especially for critical components like needles and loopers․ Reliable suppliers guarantee proper functionality and prolong the lifespan of your serger․
Safety Precautions
Always prioritize safety when operating the 1034D․ Follow electrical guidelines and general sewing machine safety practices to prevent injury or damage․
General Safety Guidelines
Before operating your Brother 1034D serger, carefully read the entire instruction manual to understand its functions and safety features․ Always disconnect the power supply before performing any maintenance, such as changing the needle or cleaning․ Keep fingers away from moving parts during operation to avoid potential injuries․
Never operate the machine if it is damaged or malfunctioning․ Ensure the area around the machine is well-lit and free of obstructions․ Avoid using excessive force when feeding fabric, and always use the appropriate accessories for the task․ Supervise children and inexperienced users when they are near the serger․ Proper safety awareness ensures a pleasant and productive sewing experience․
Electrical Safety Information
To ensure safe operation of your Brother 1034D, always verify the power supply matches the machine’s voltage requirements․ Never operate the serger with a damaged power cord or plug; replace them immediately․ Avoid using extension cords if possible, and if necessary, ensure they are properly grounded and rated for the machine’s power consumption․
Do not expose the machine to moisture or operate it with wet hands․ When unplugging the machine, grasp the plug – not the cord – to prevent damage․ If the machine experiences an electrical malfunction, disconnect it from the power source and consult a qualified technician․ Regular inspection of the electrical components is crucial for preventing hazards․